
COMPLETED KITCHEN PROJECT IN BELLEVUE, WASHINGTON
Kitchen Remodel in Bellevue, WA With an Open-Concept Main Floor
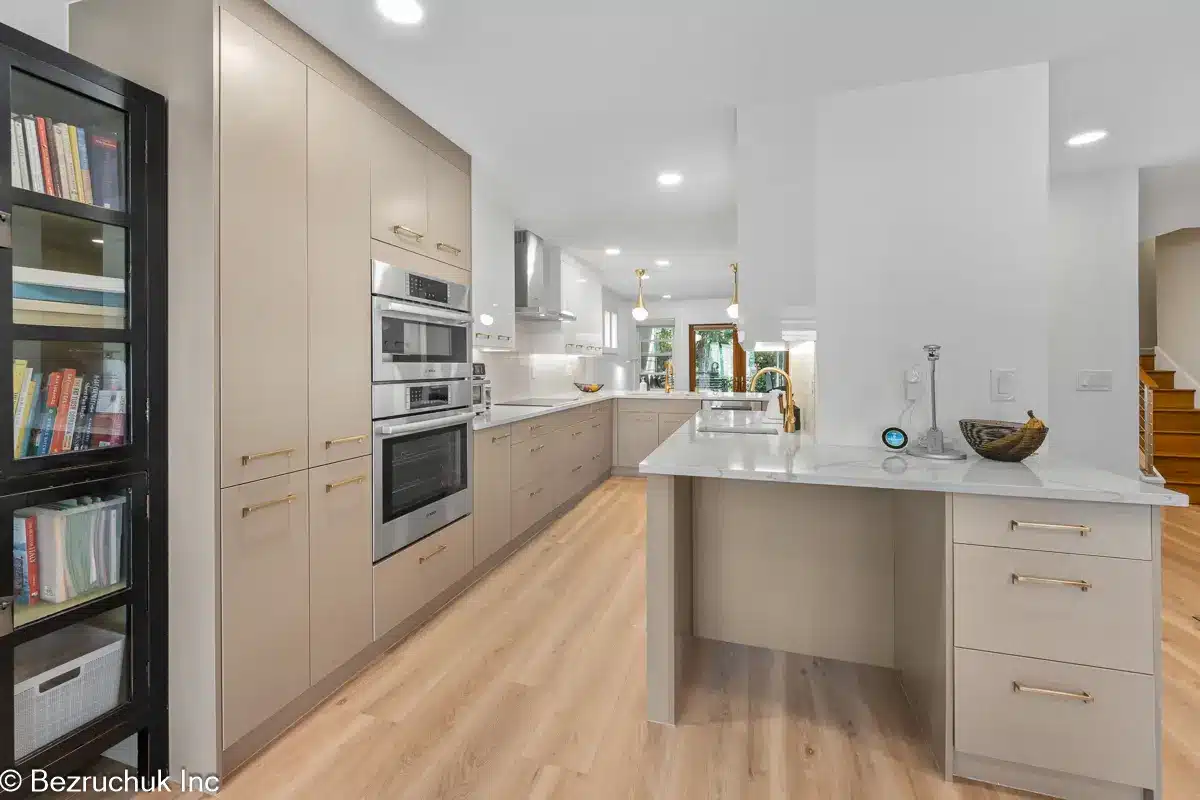
This completed kitchen remodel in Bellevue, WA expanded into a coordinated main-floor renovation with a new wall opening, European-style cabinetry, New Calacatta Laza quartz, built-in appliances, a matching laundry room, more than 1,100 square feet of new LVP flooring, and a custom fireplace surround. During demolition, concealed shear-wall plywood changed the original wall-removal plan, so Bezruchuk Inc. paused the work and coordinated additional engineering and inspection review before proceeding.

- Completed Bellevue Project
- Open-concept kitchen remodel with coordinated main-floor updates
- Cabinet style
- European flat panel
- Countertops
- New Calacatta Laza quartz
- Connected scope
- Laundry, flooring and fireplace
Compare the Original Kitchen With the Completed Open-Concept Remodel
Move the comparison slider to see how the closed cabinet wall and older galley layout changed after the wall opening, new cabinetry, flooring, countertops, lighting, and appliance installation.


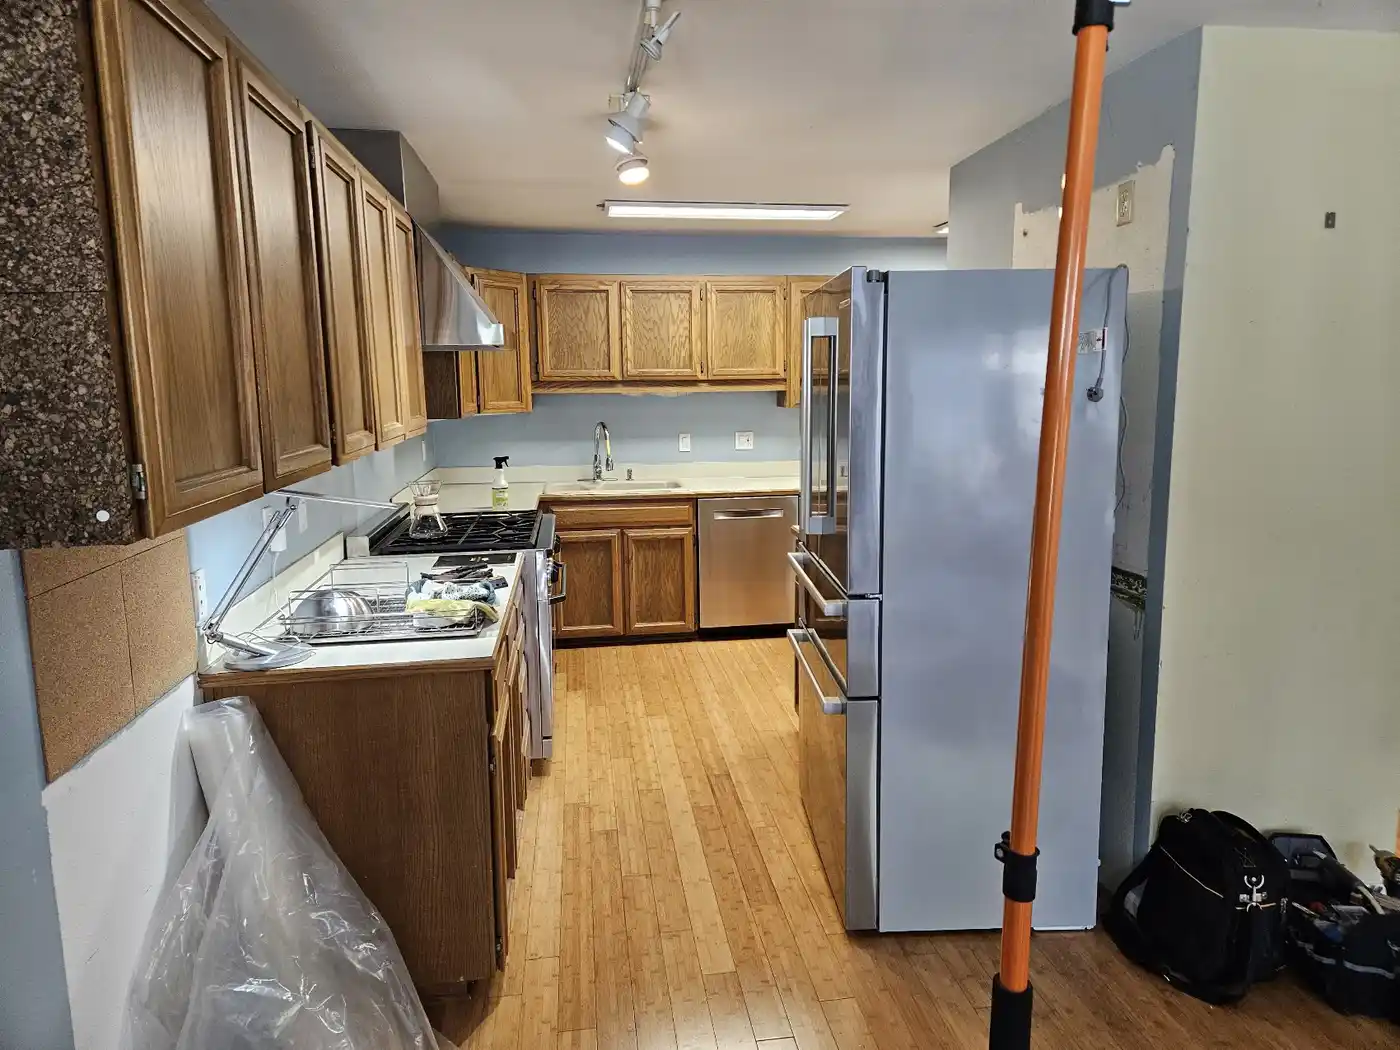
The Original Galley Kitchen and Closed Cabinet Wall
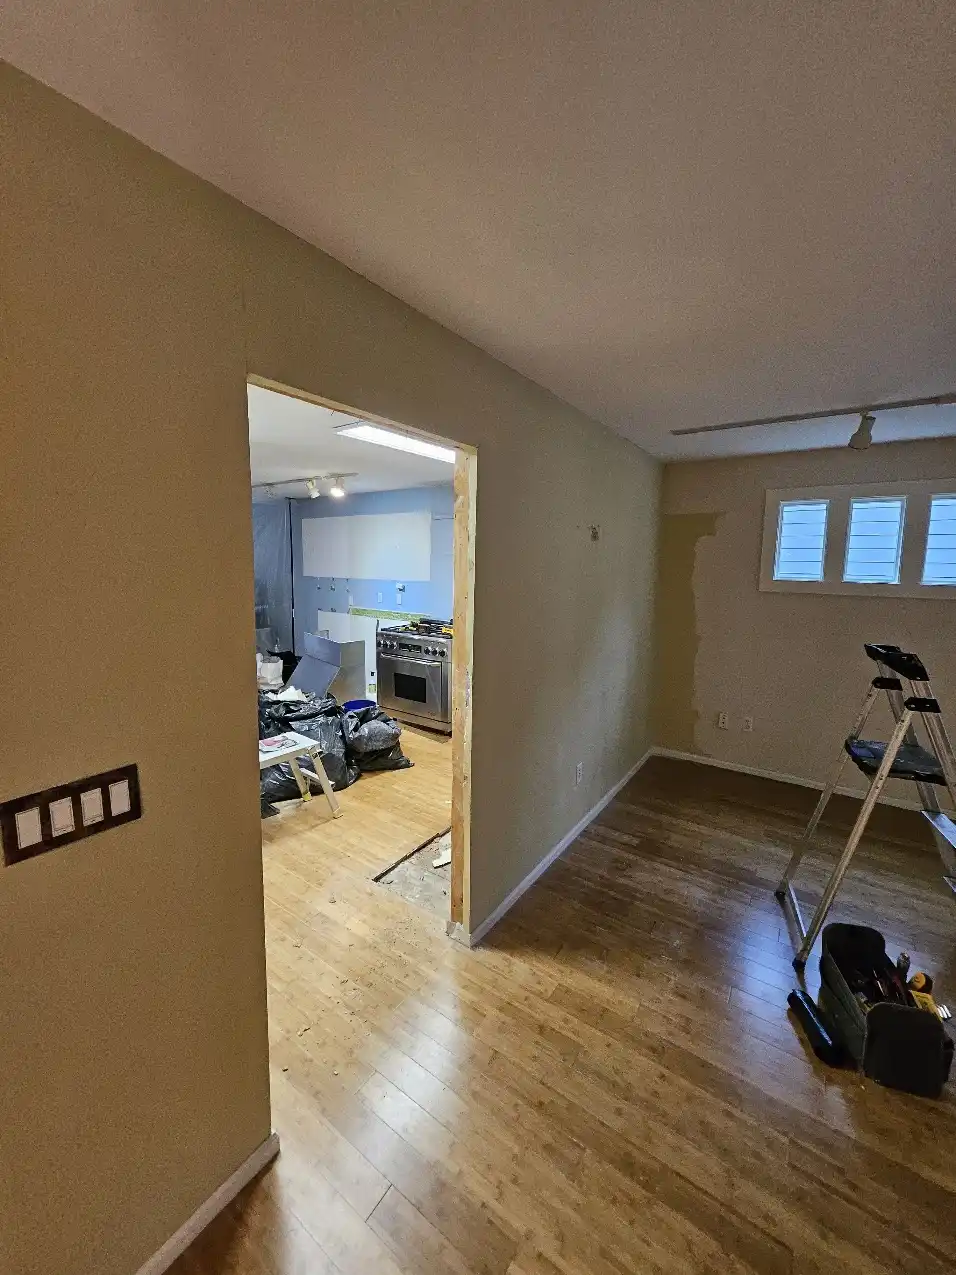
The original kitchen was separated from the adjacent main-floor space by a cabinet wall. The remodel was planned to create a more open connection, improve appliance placement and storage, coordinate the nearby laundry room, and carry one flooring finish across the main level.
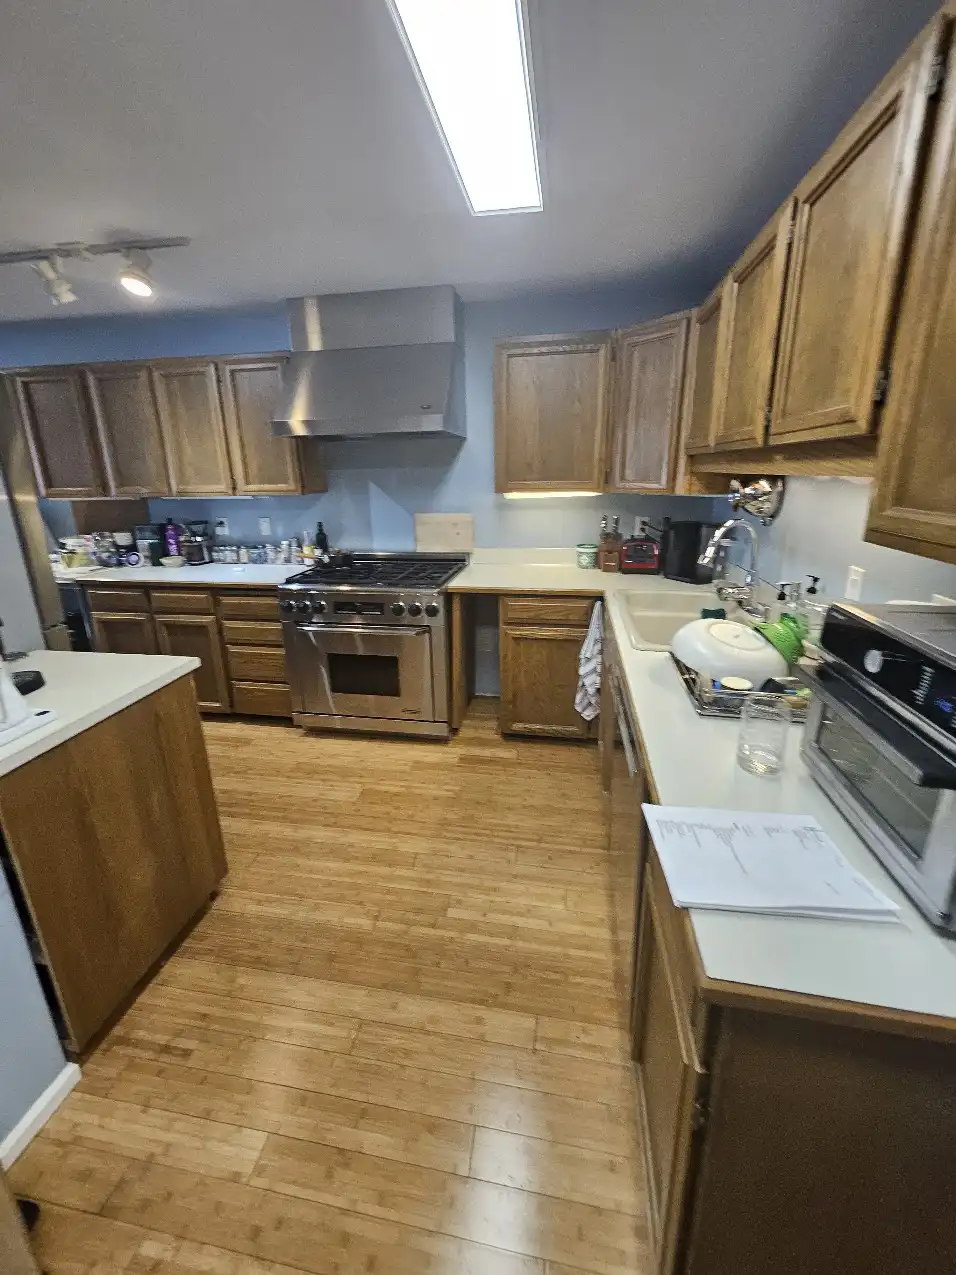
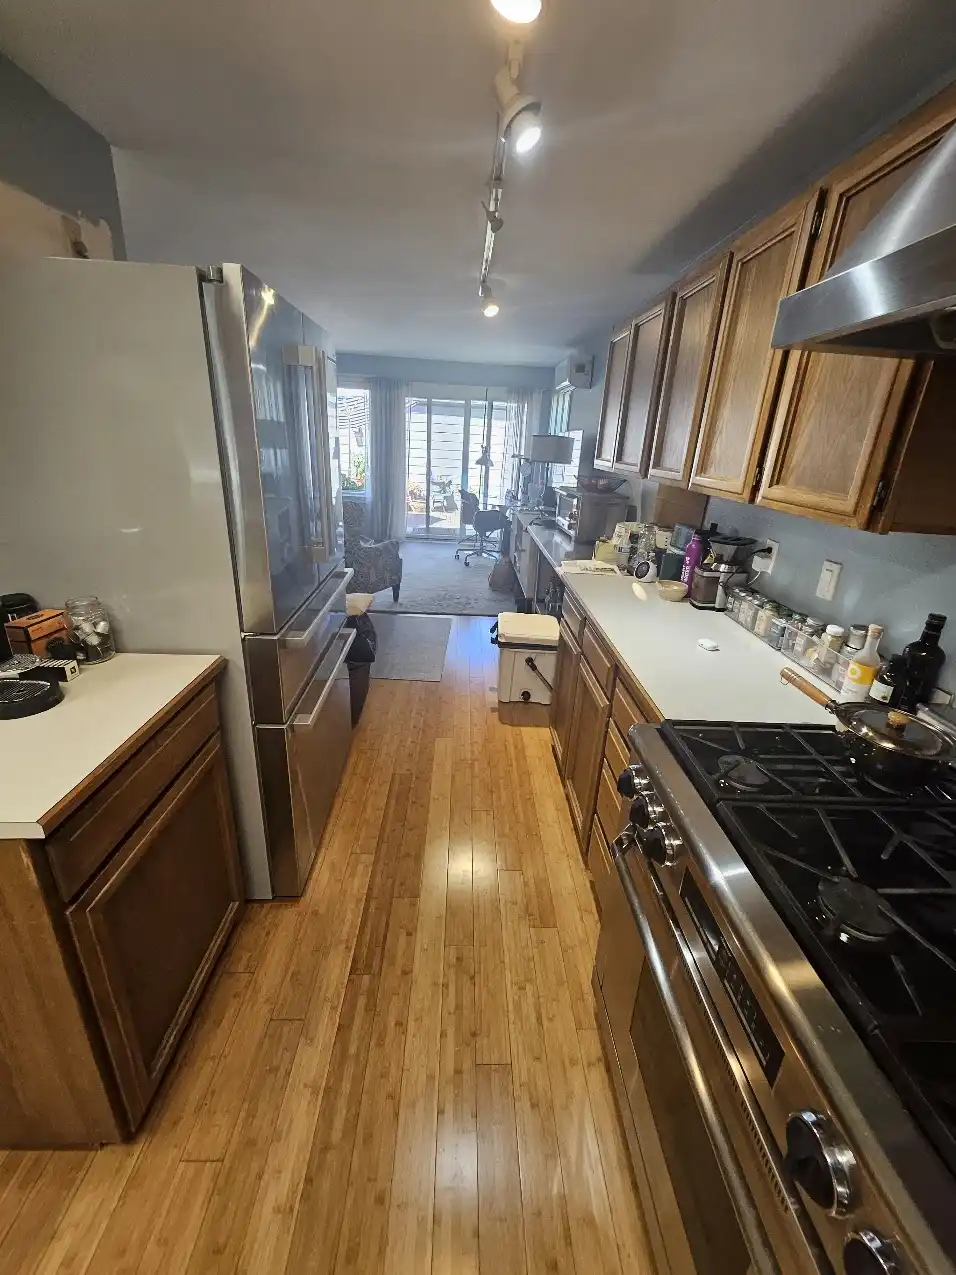
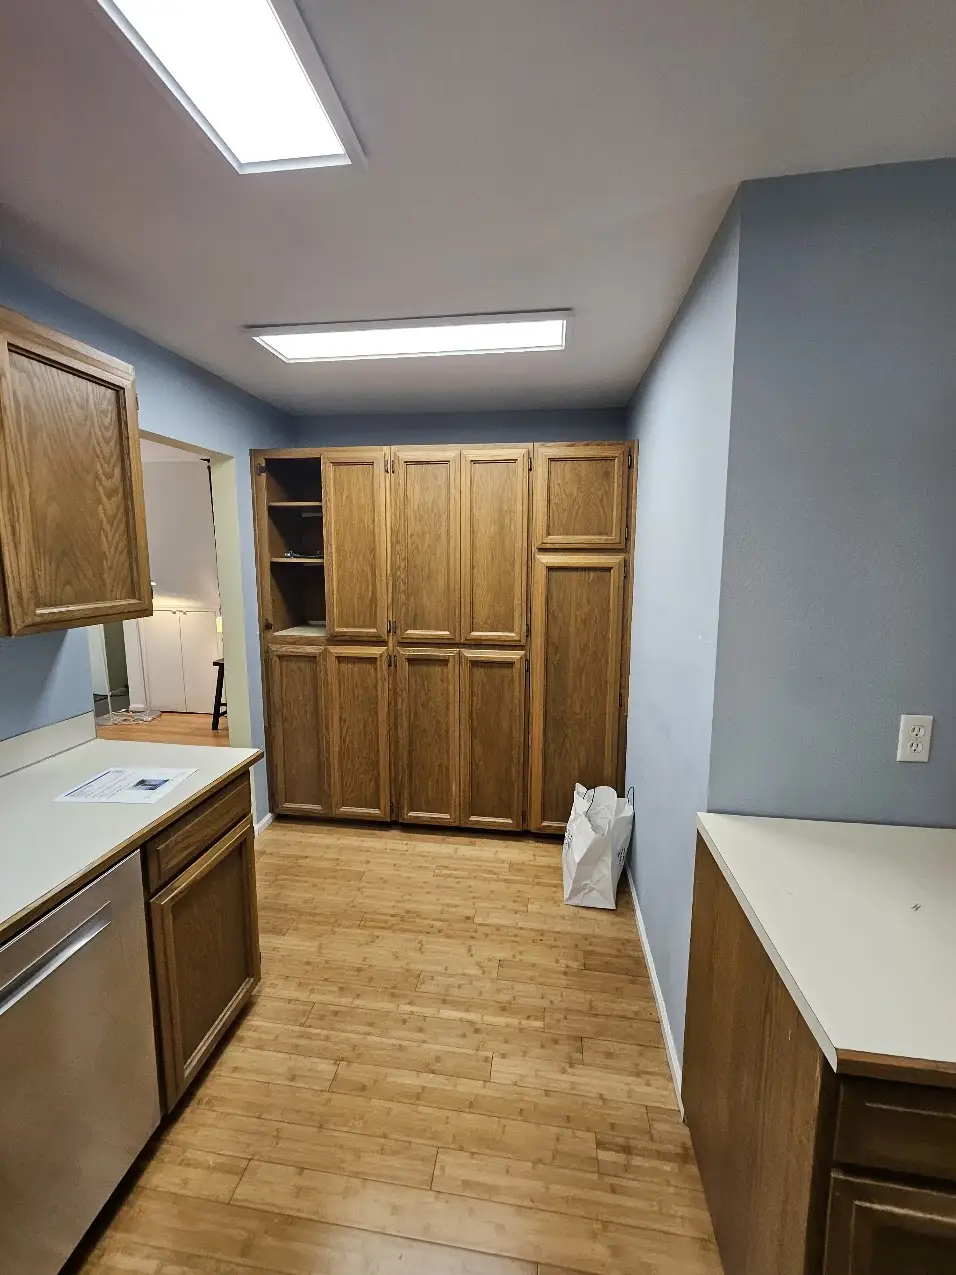
The kitchen layout, wall opening, laundry cabinetry, flooring, appliances, lighting and fireplace work had to be coordinated in a practical construction sequence.
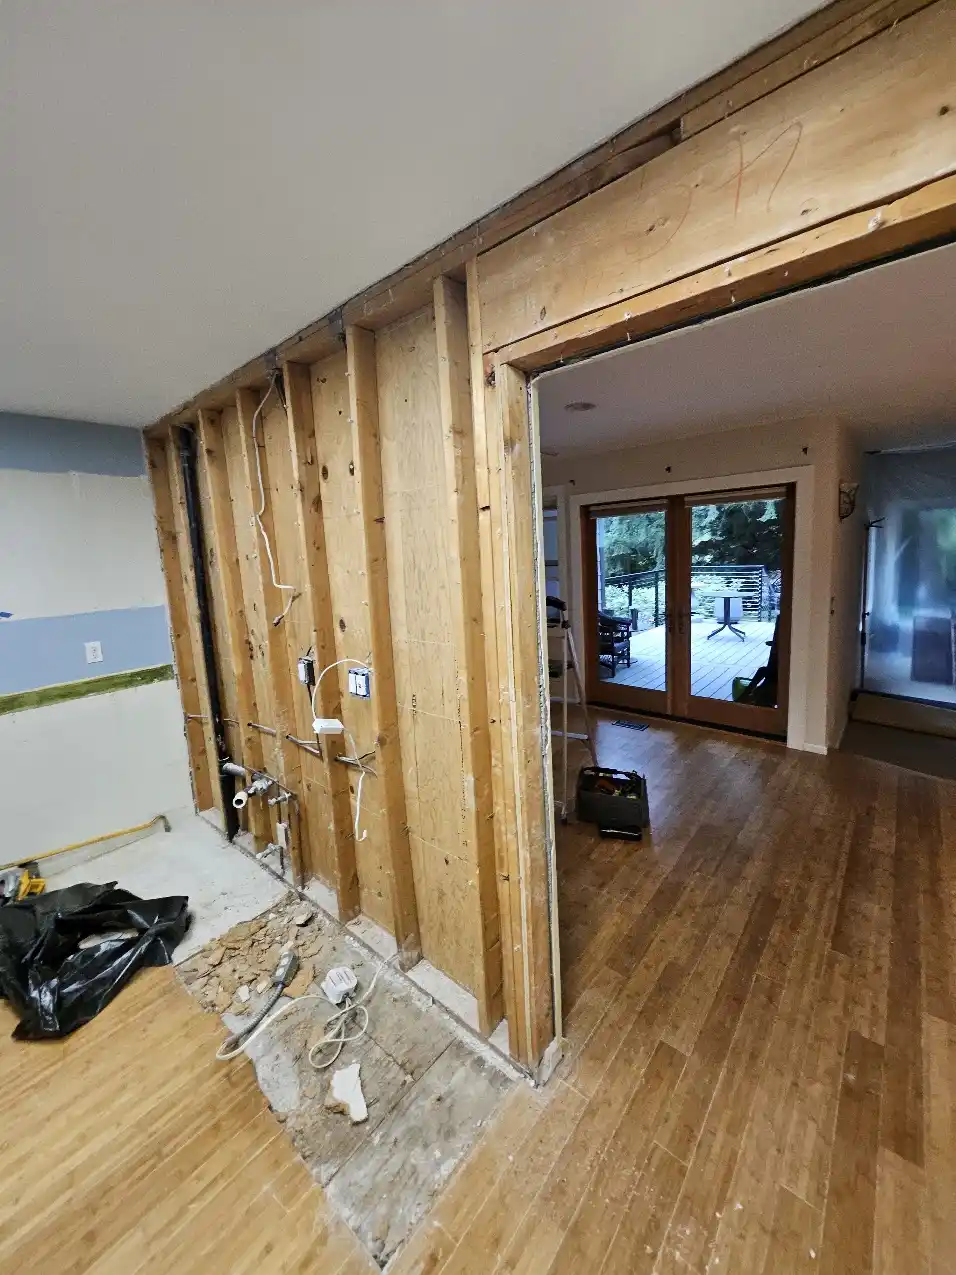
A Concealed Shear-Wall Condition Changed the Wall-Opening Plan
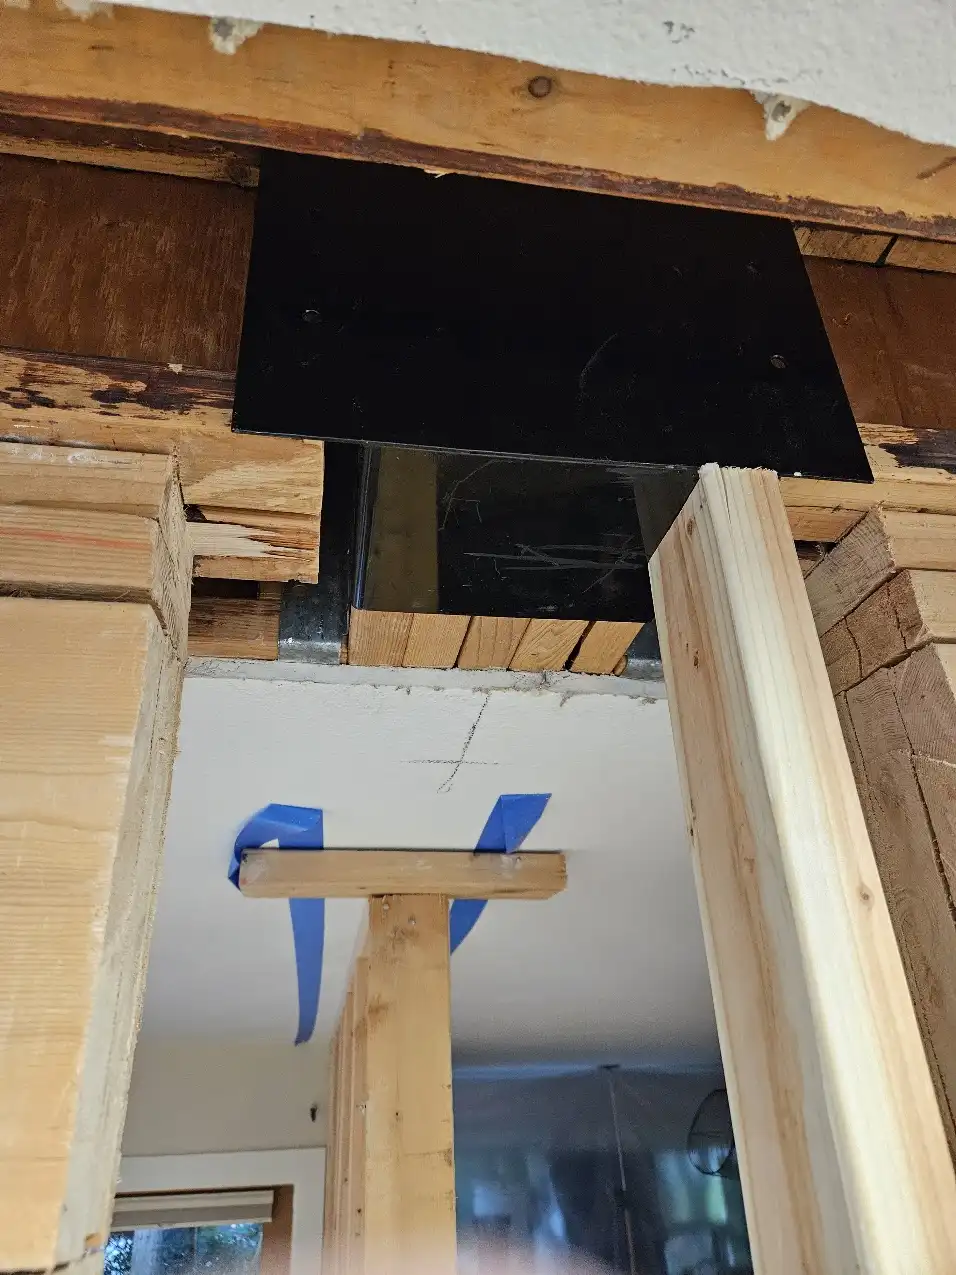
The wall had previously been described as non-load-bearing. Once demolition exposed plywood associated with a shear-wall condition, Bezruchuk Inc. paused the removal and requested additional engineering direction rather than proceeding from the original assumption.
The project proceeded through the City of Bellevue review process with Bezruchuk Inc. listed as the contractor. The exposed condition required additional engineering coordination and inspection review before the final support approach could be confirmed.
The finished opening used a custom metal support detail. This case study does not present that solution as a standard detail for other homes; the required approach depends on the existing structure, engineering and permit review for each property.
What the project process demonstrates
- Concealed conditions may differ from preliminary assumptions.
- Demolition should stop when field conditions raise a structural question.
- Engineering, inspection and construction sequencing must remain coordinated.
- Finish work begins only after the approved opening and support are established.
European-Style Cabinetry Planned Around Appliances, Storage and Connected Rooms
The homeowner reviewed and approved the final kitchen layout and renderings before fabrication. The design used warm gray or cloth-gray lower cabinetry, contrasting light upper cabinets, tall storage, a dedicated spice pullout, and coordinated cabinetry in the laundry and powder room.
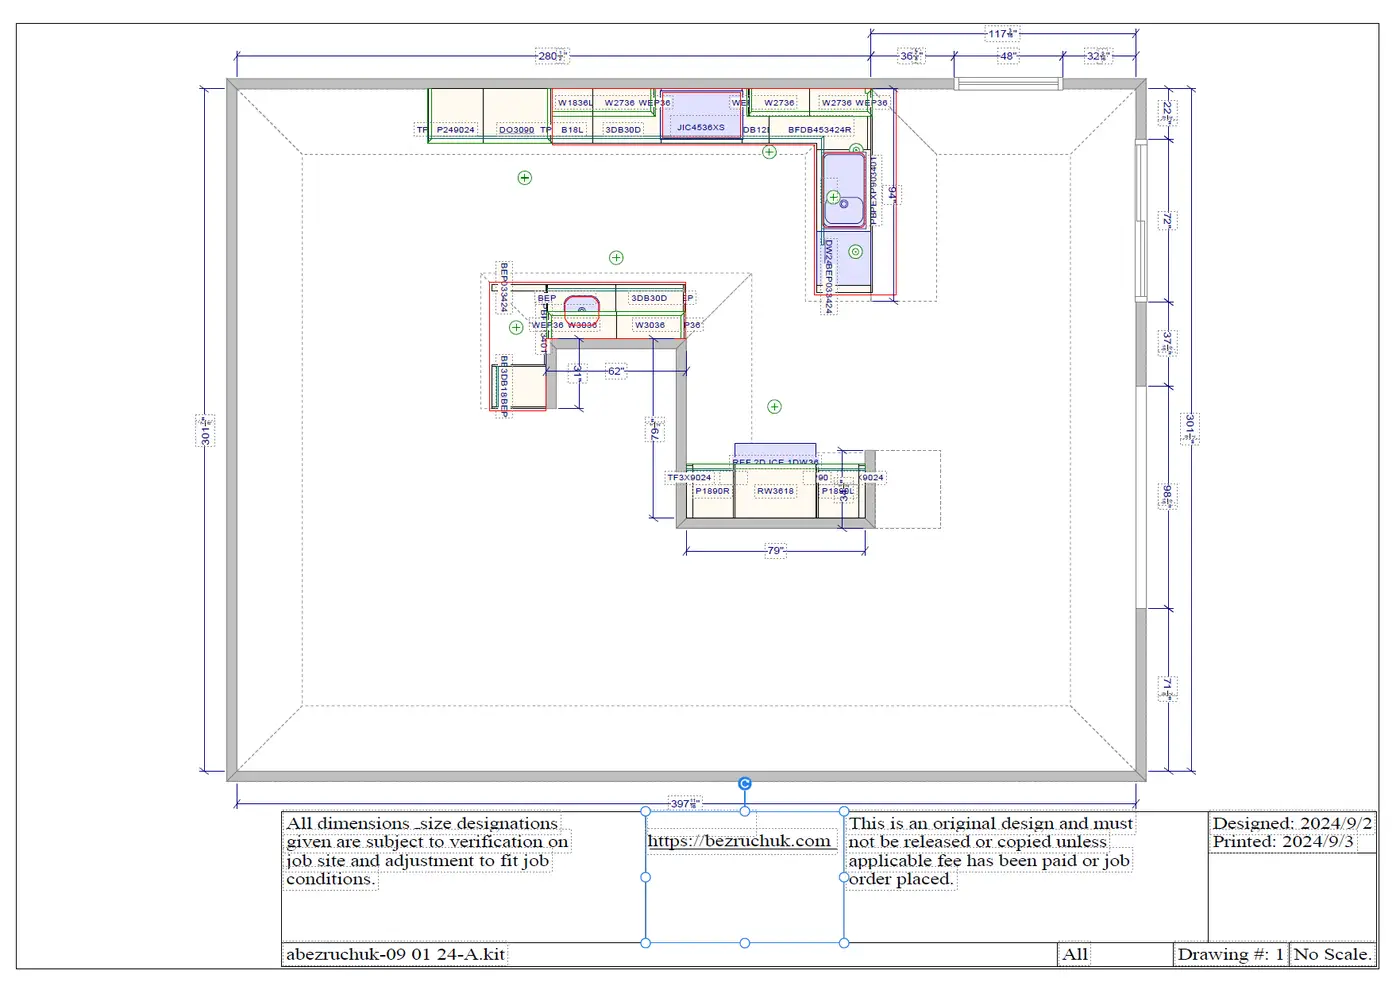
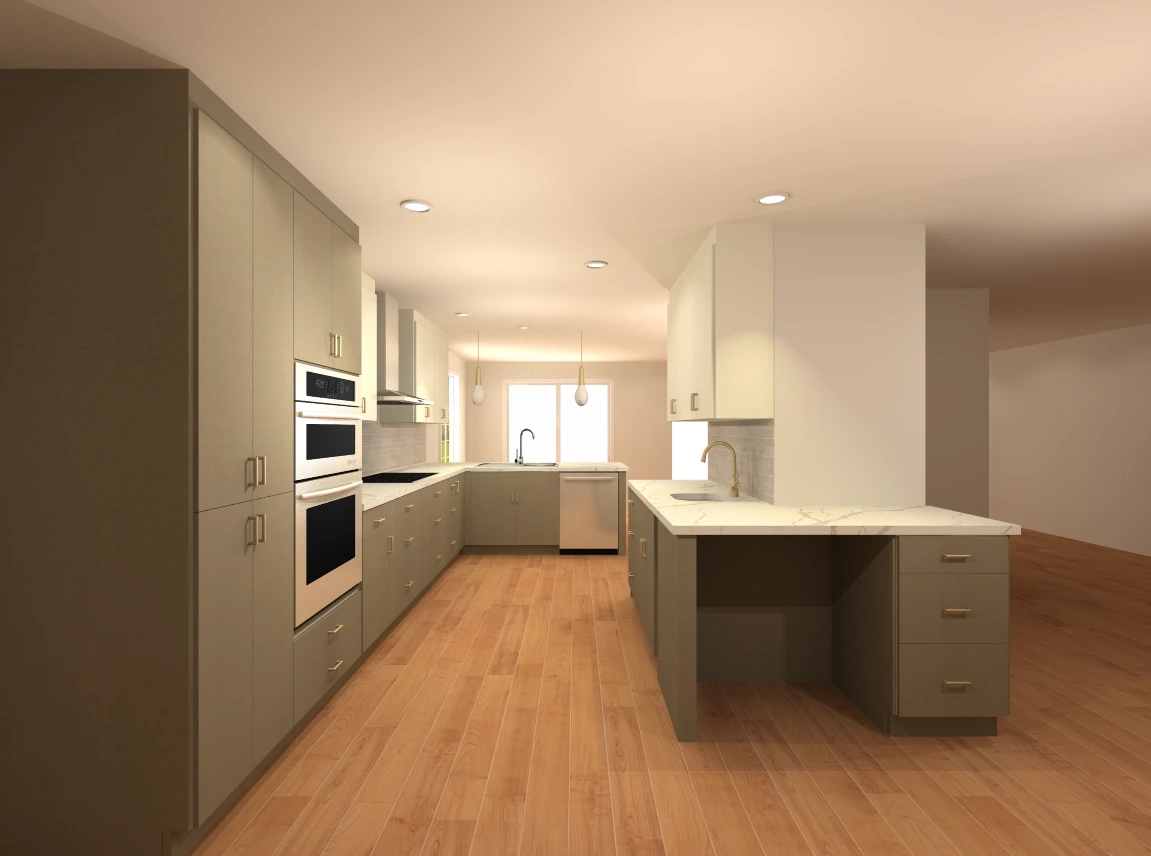
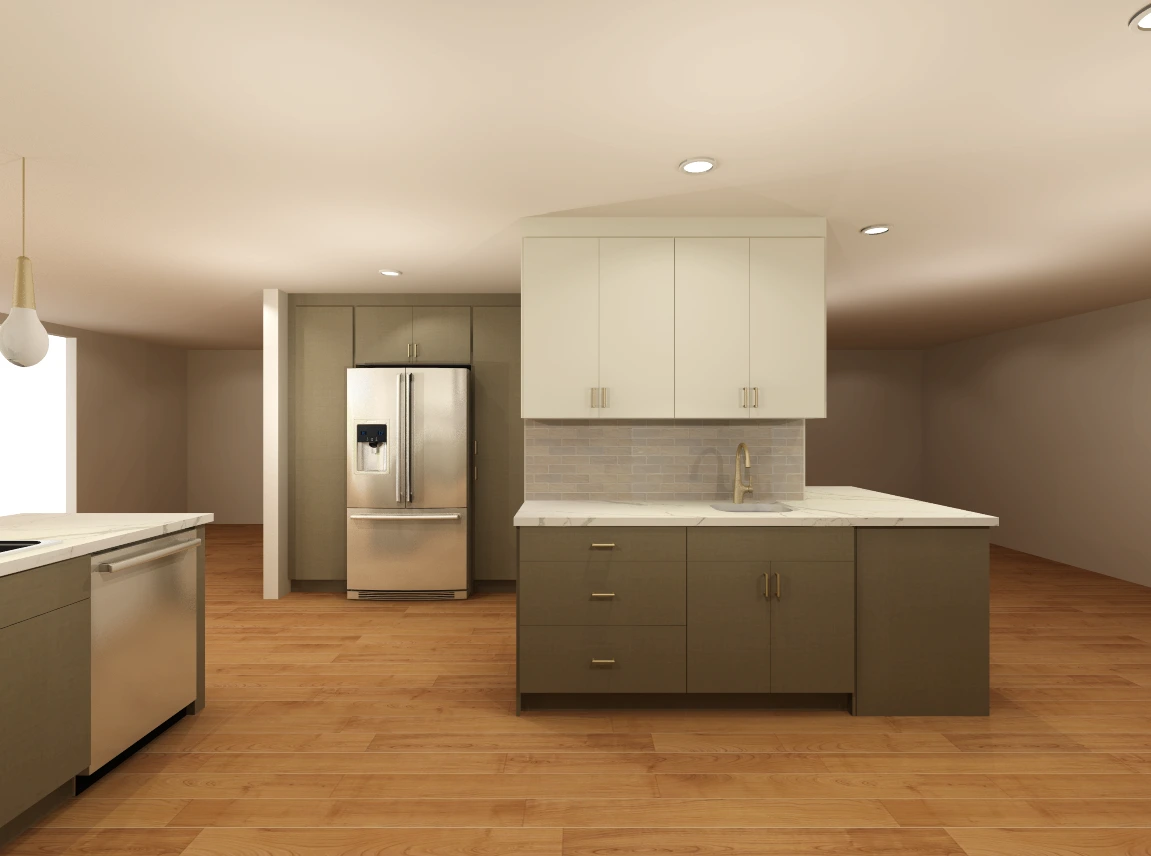
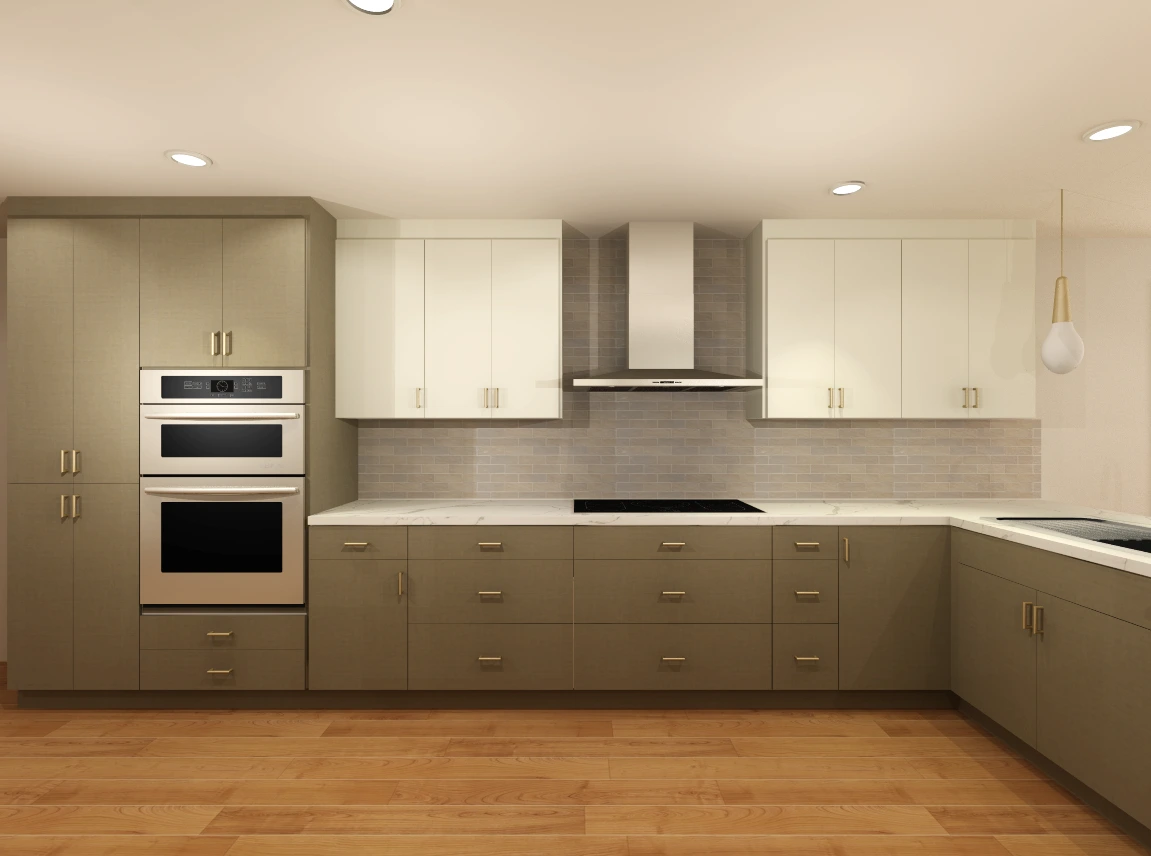
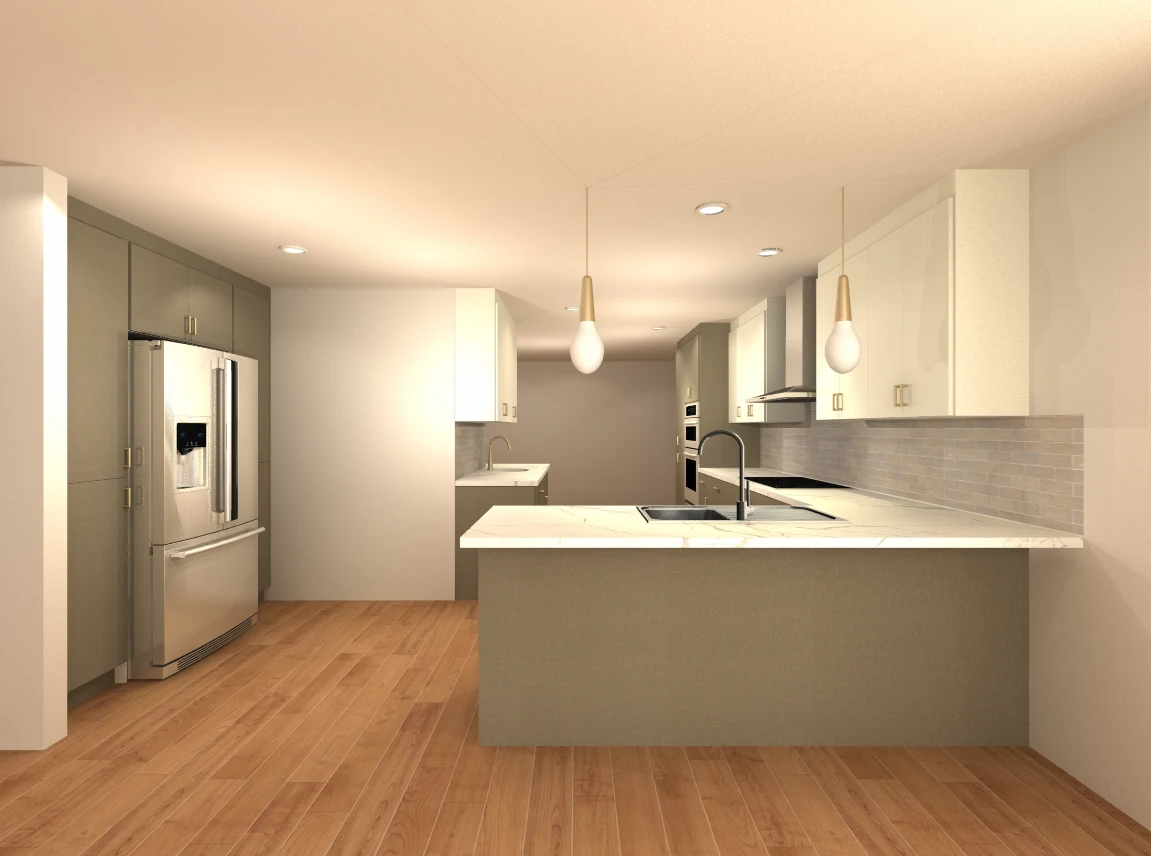
The homeowner reviewed the layout before fabrication so cabinet colors, storage, appliance openings and the relationship to the wall opening could be confirmed before materials were ordered.
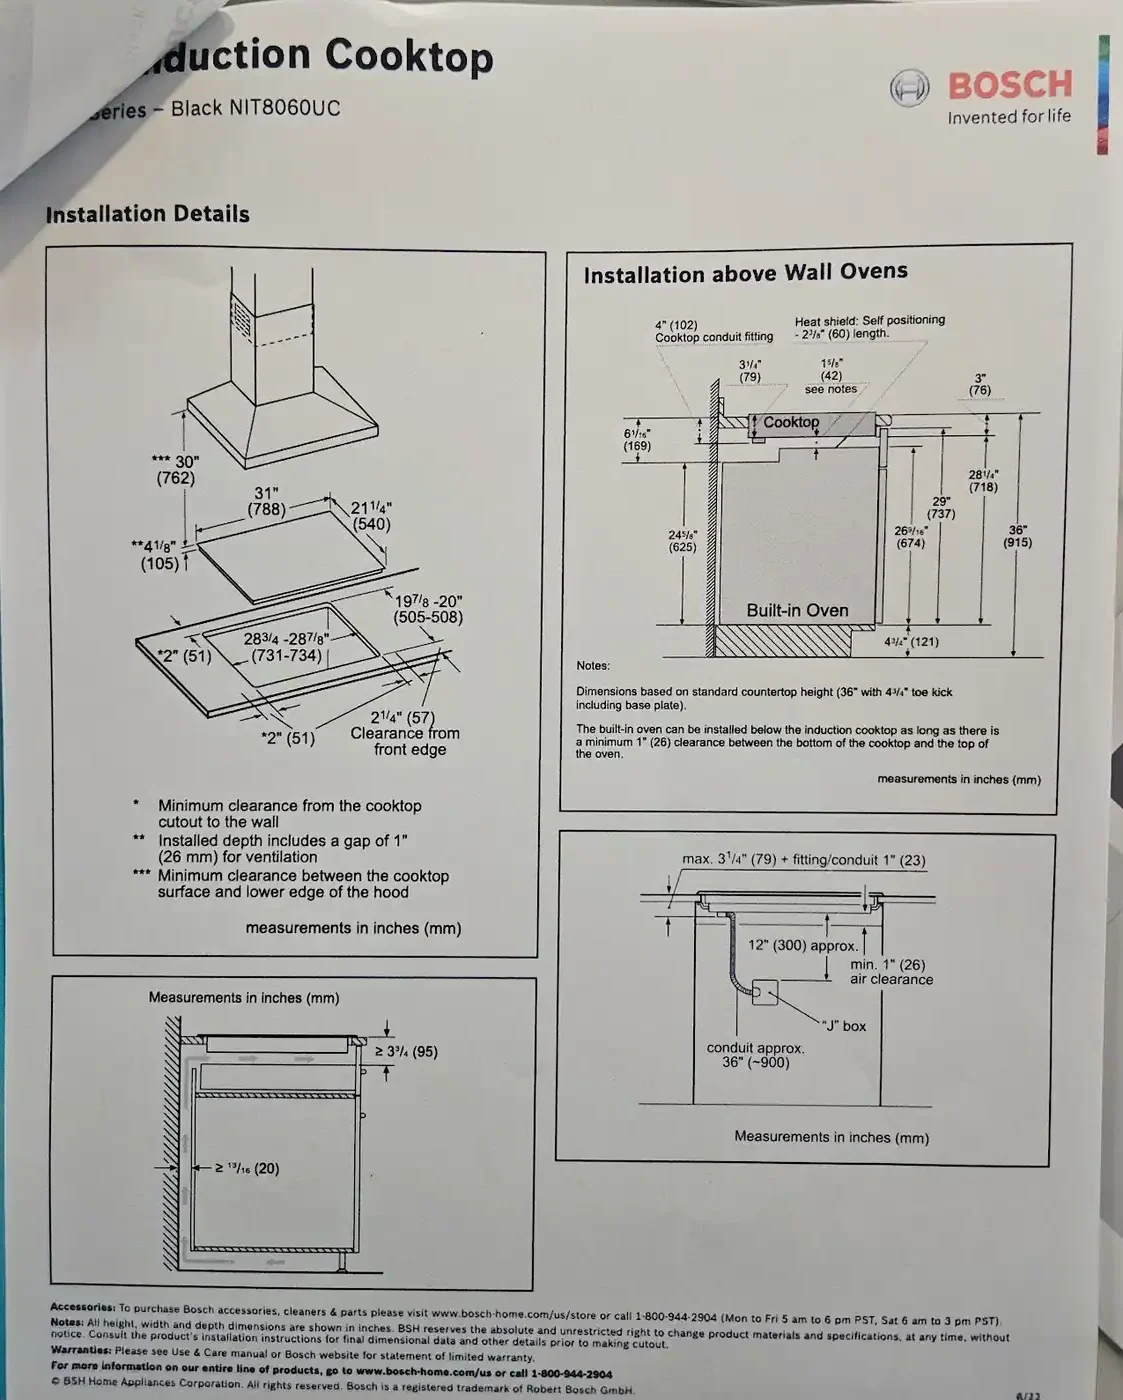
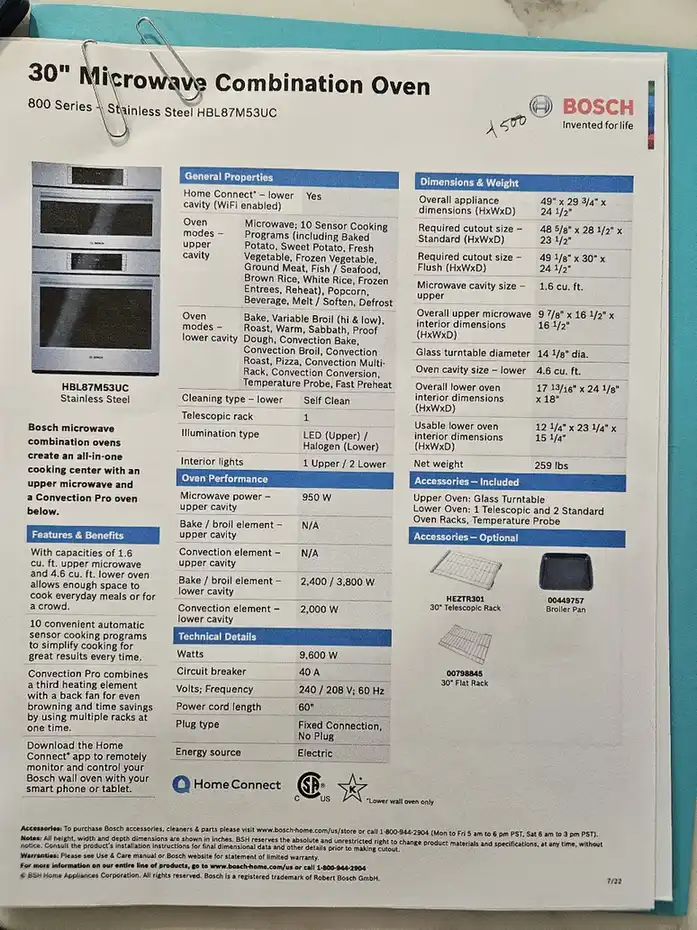
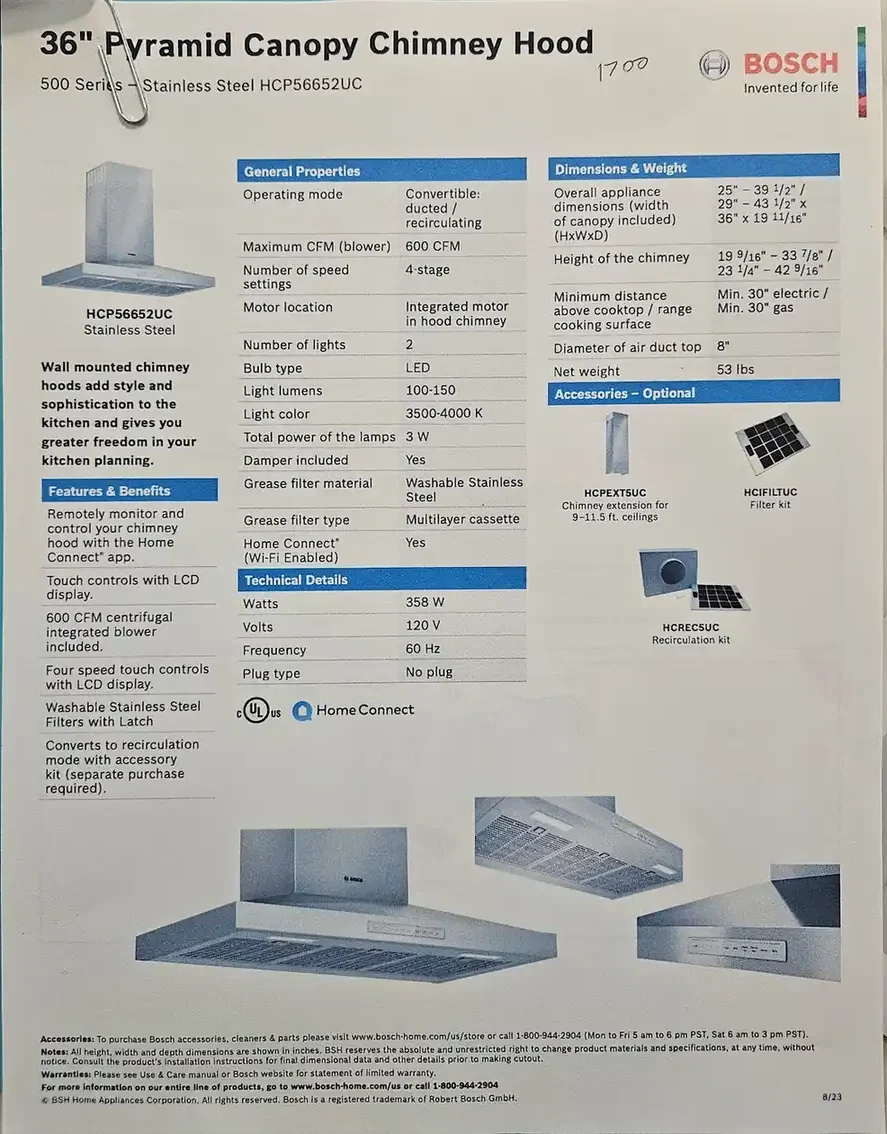
Design approval
Layout and renderings were approved before materials were ordered.
Material lead time
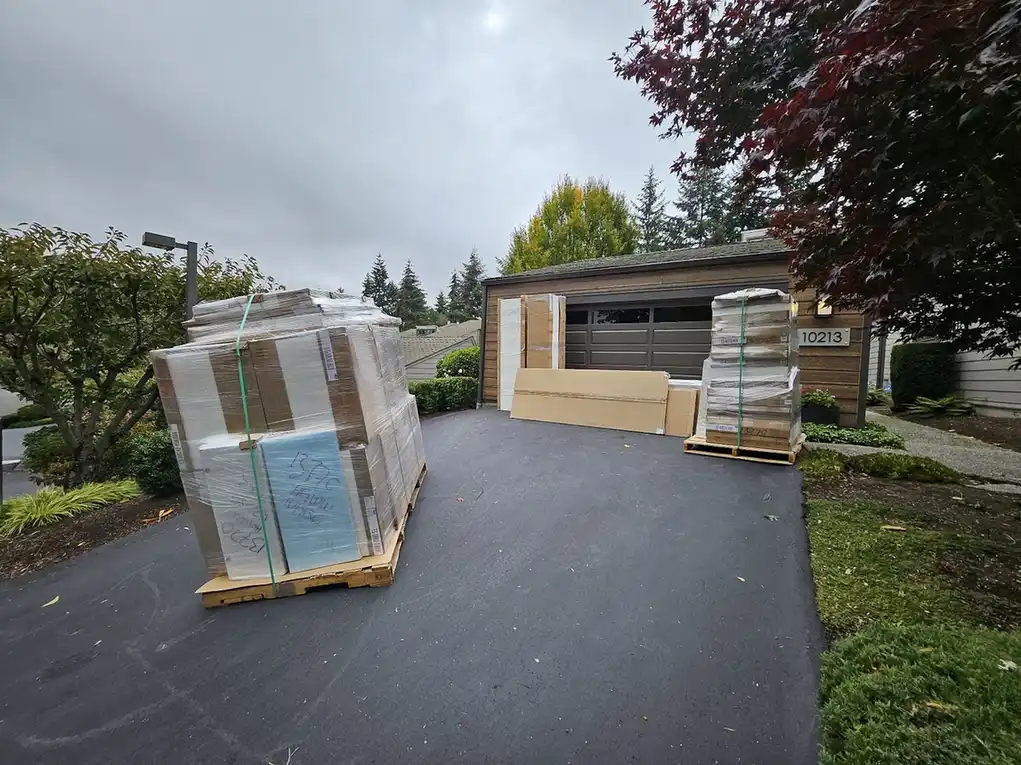
Materials had an estimated three-to-four-week lead time.
Appliance coordination
Appliance openings were checked against selected specifications.
Connected finishes
Cabinet colors were coordinated across the kitchen and nearby rooms.
Cabinet, Countertop and Appliance Installation in Sequence
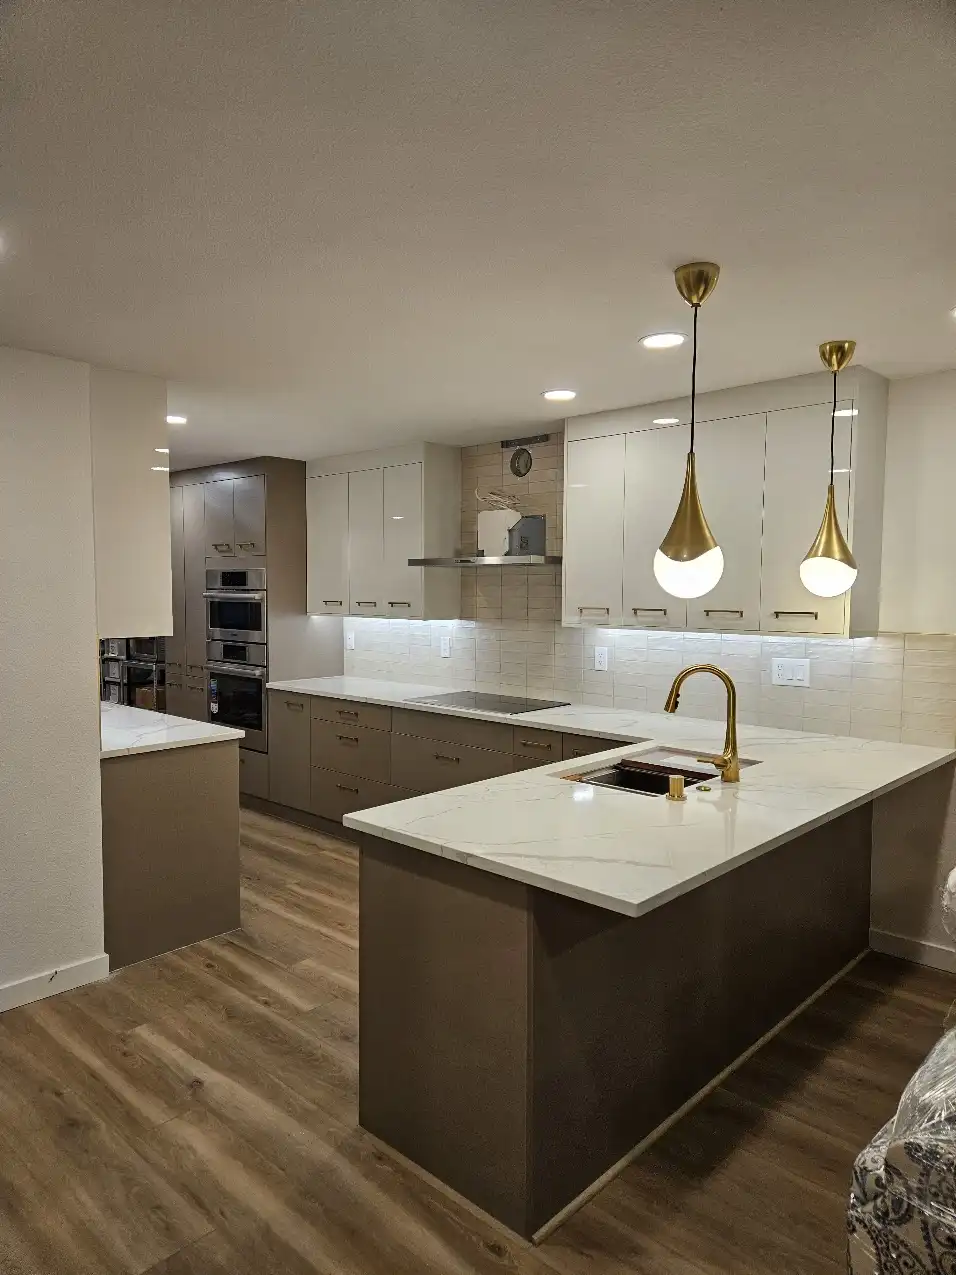
The progress photographs show why the major installations could not be treated as separate tasks. Cabinet positions established the countertop template, appliance openings affected panels and electrical circuits, and the final finish work depended on accurate alignment at every earlier stage.
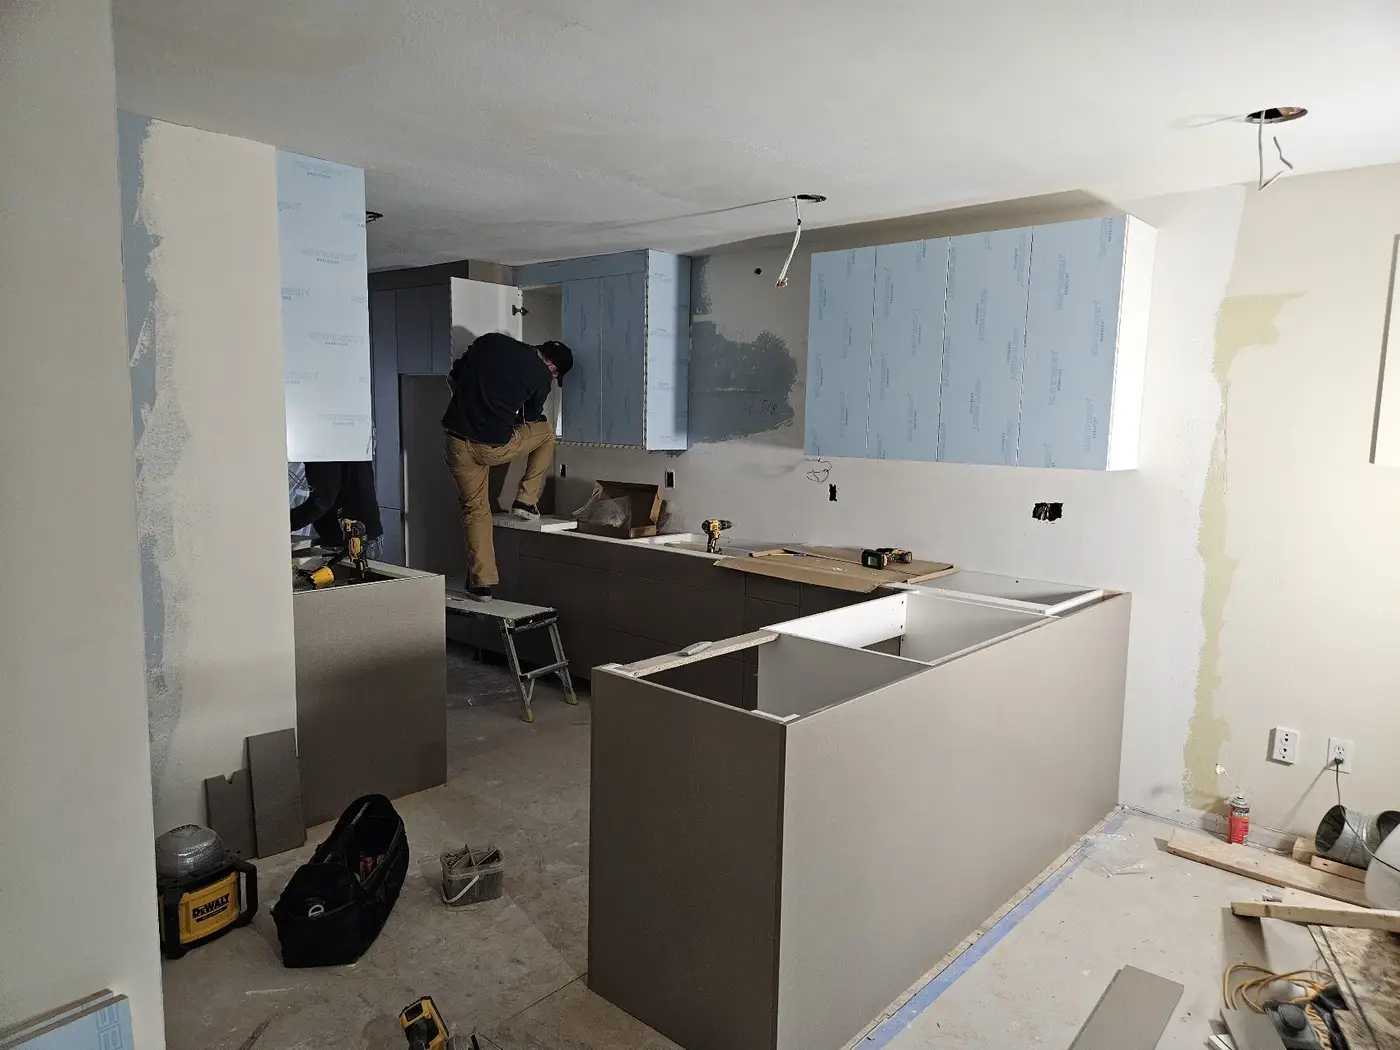
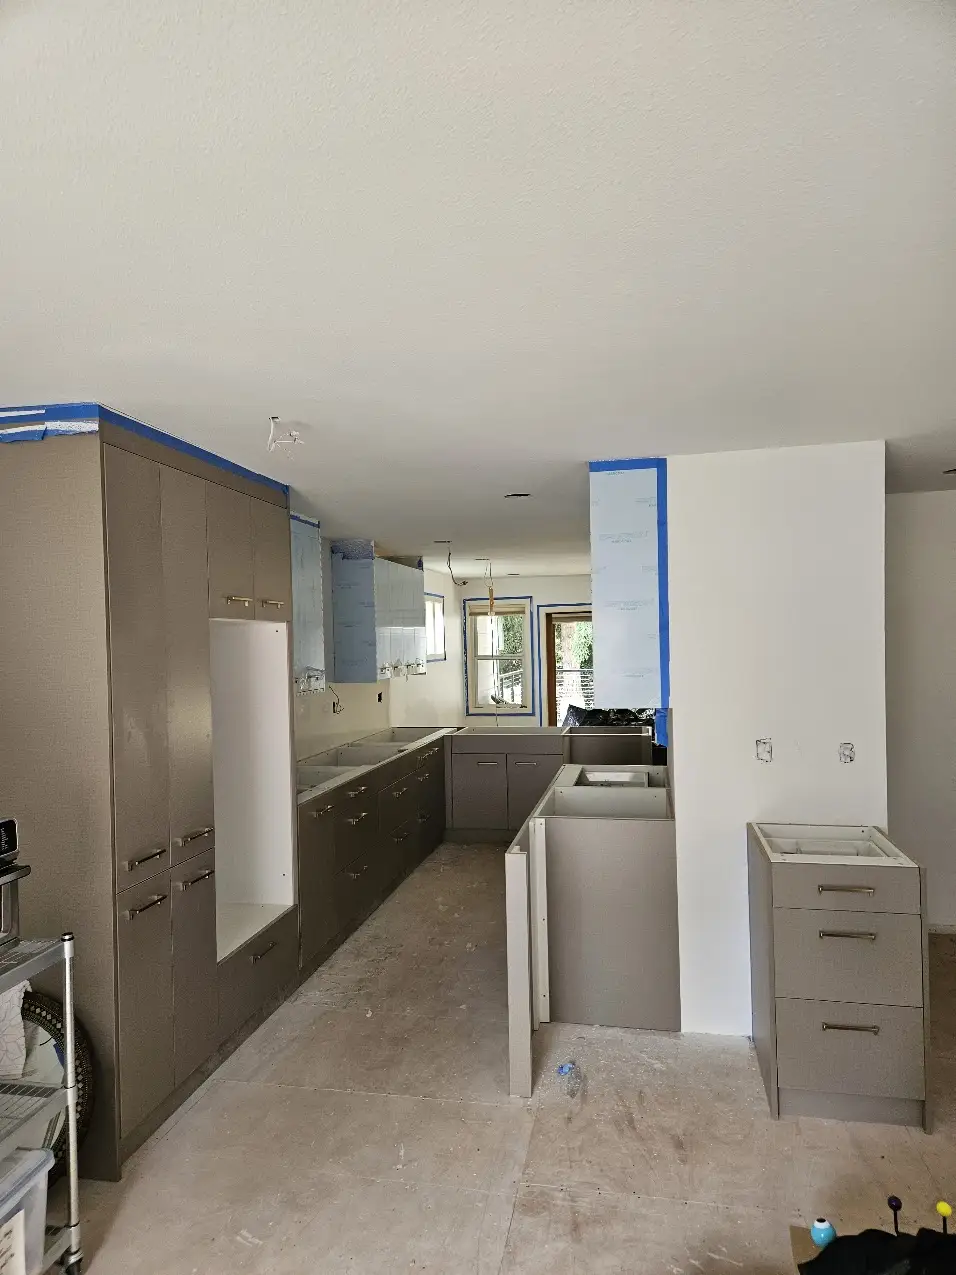
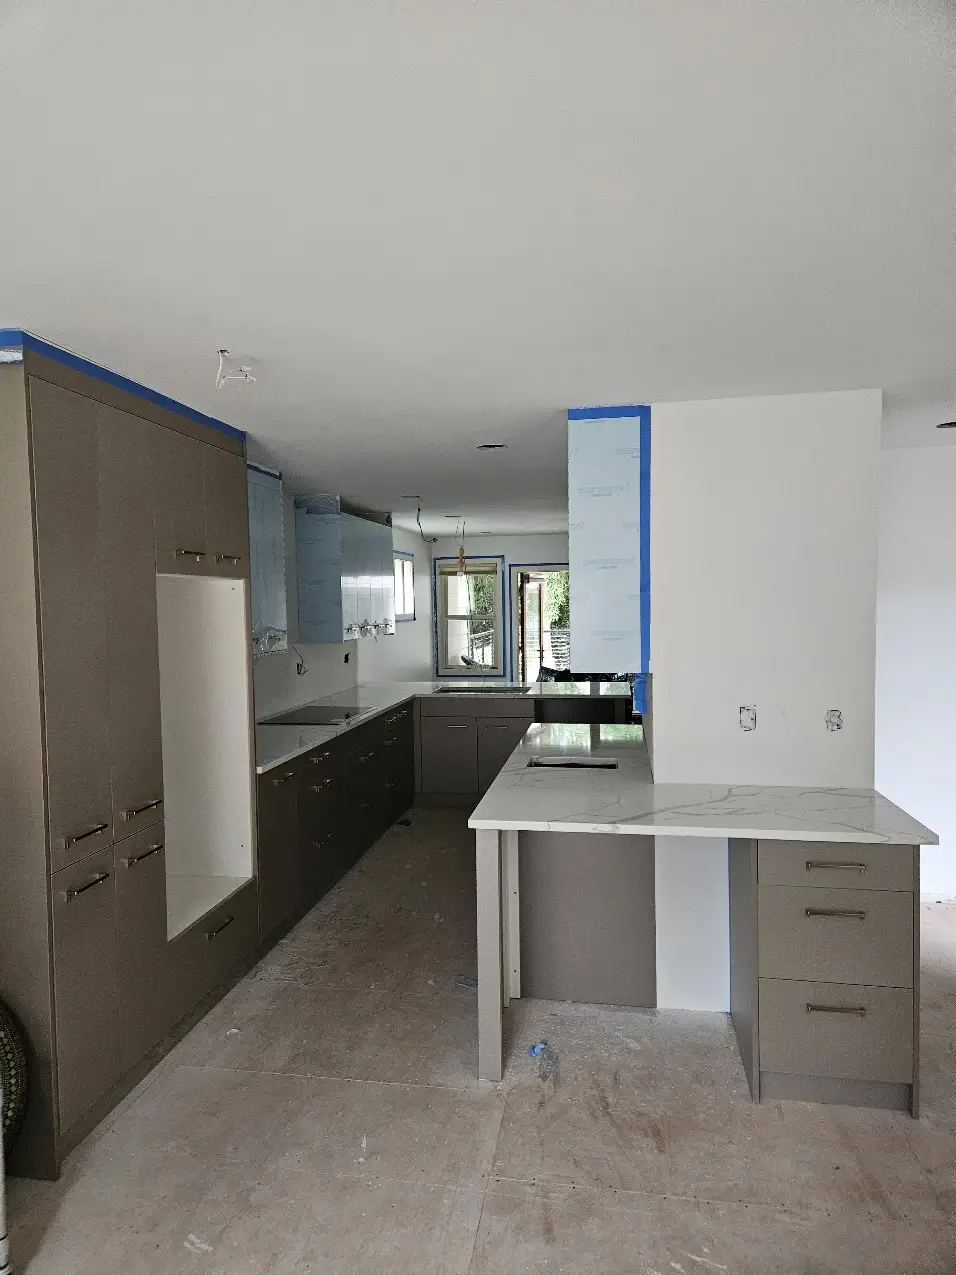
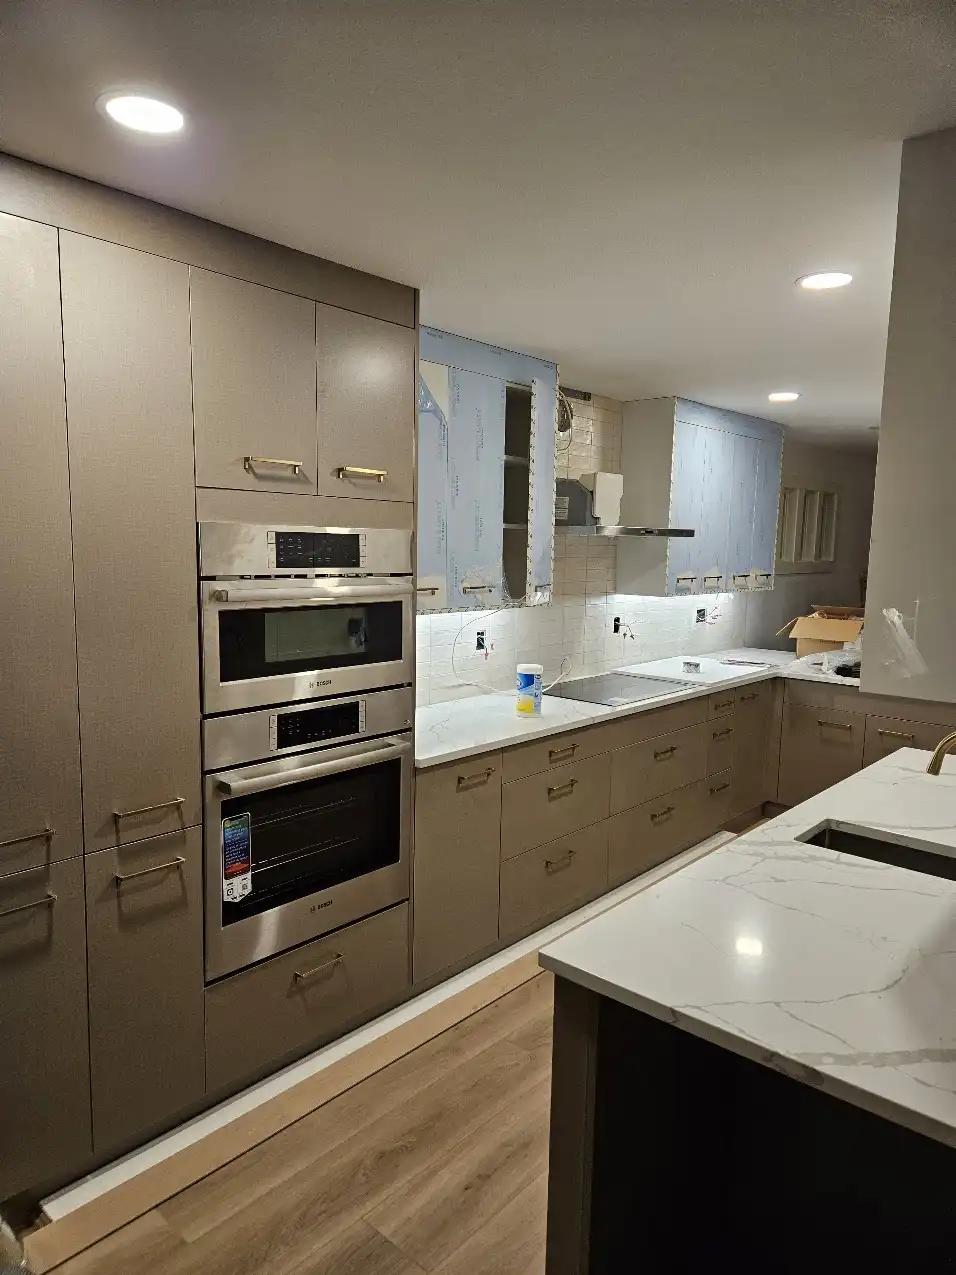
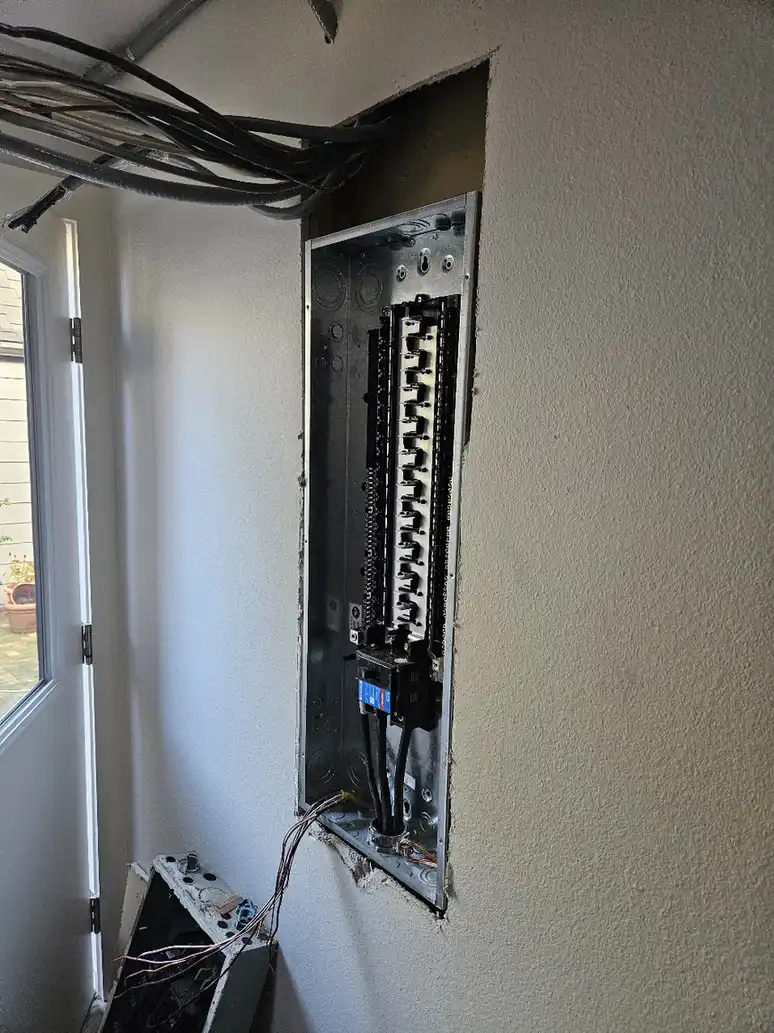
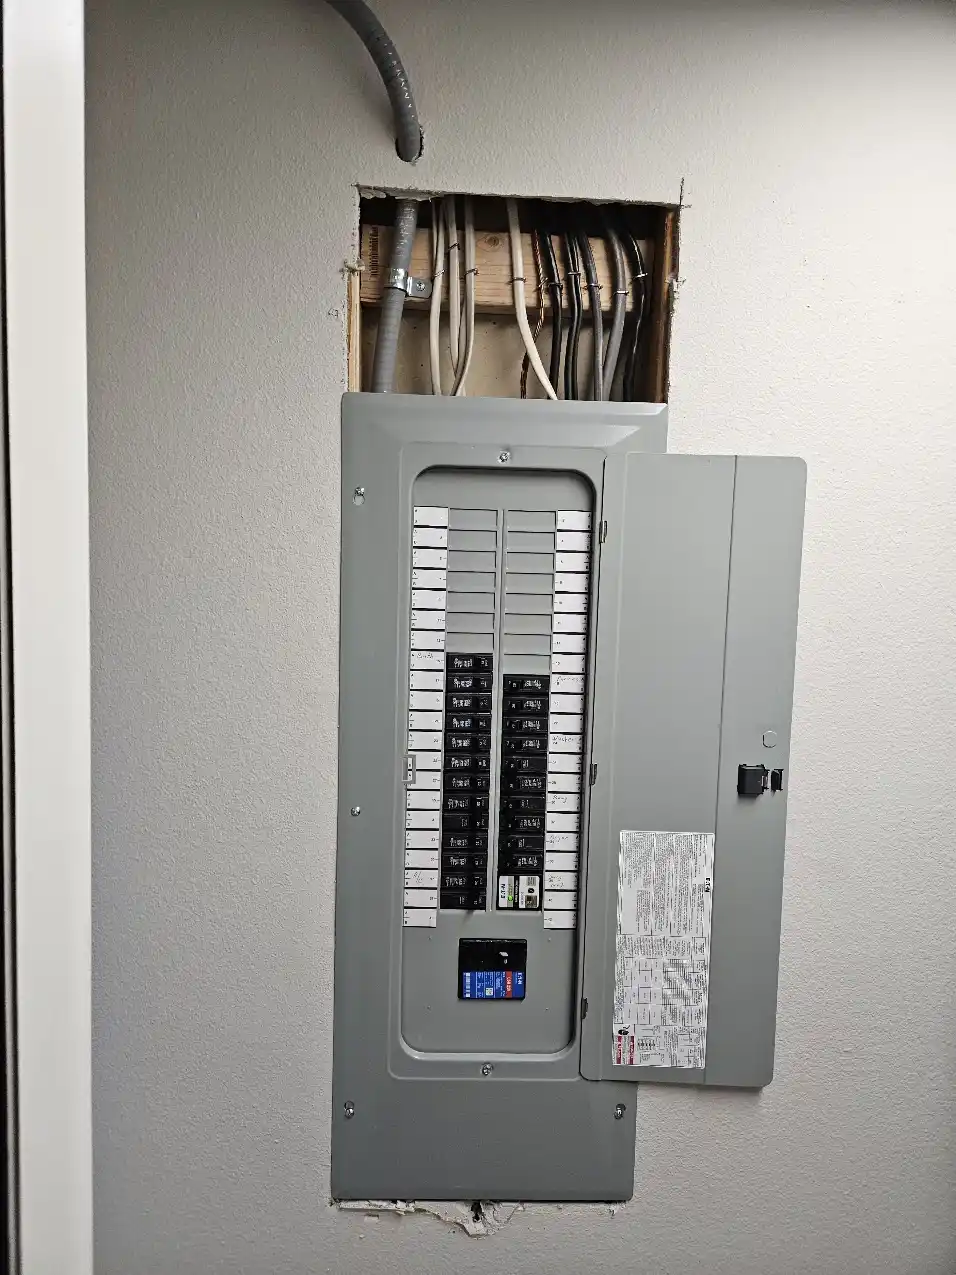
Later in the remodel, the homeowner requested replacement of an outdated panel that lacked sufficient capacity for the updated appliance circuits. A licensed electrician completed the work with a scheduled utility shutdown; the service amperage and meter were not changed.
Completed Bellevue Kitchen Remodel Gallery
Open a photograph to explore the completed Bellevue kitchen at full size. The viewer also includes the original kitchen, construction photographs, design renderings and appliance planning images.


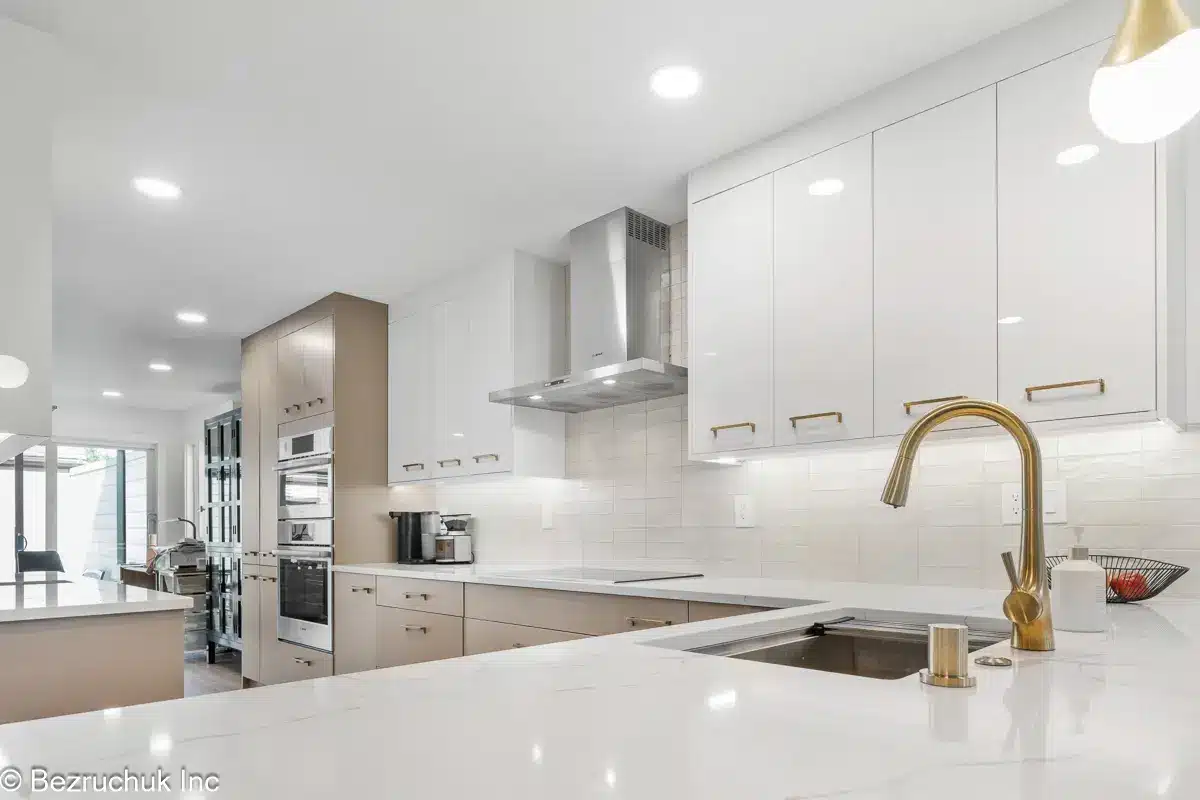


New Calacatta Laza Quartz and Warm, Textured Finishes
Two slabs of New Calacatta Laza quartz were used across the kitchen and adjoining laundry room. Flat-polished edges, sink and fixture cutouts, and the relationship between the peninsula, perimeter counters and connected laundry surfaces were finalized after cabinet templating.
Quartz
New Calacatta Laza provided a bright surface with restrained veining across the kitchen and laundry.
Backsplash
Montauk Sand Dune Beige 2-by-8 tile added warmth and texture between the gray and light cabinet finishes.
Lighting
Under-cabinet lighting and pendant fixtures were coordinated with the appliance circuits and cabinet installation.
Fixtures
The main workstation sink and smaller secondary sink were incorporated into the approved countertop layout.
A Matching Laundry Room Extended the Cabinet and Countertop Plan
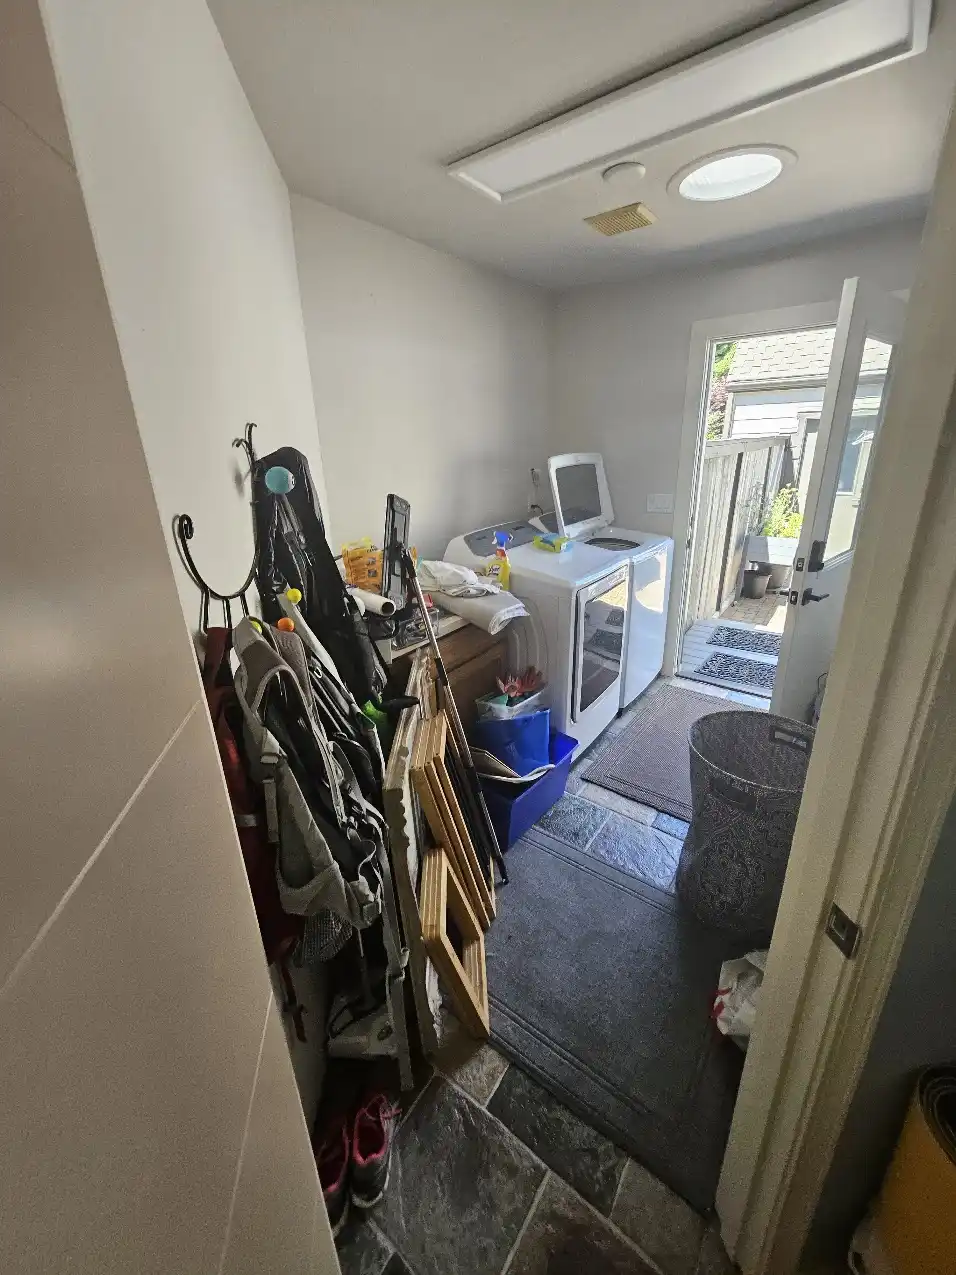
The laundry room was included as part of the connected remodel rather than treated as an unrelated later update. The approved design used cloth-gray lower cabinets and cream-white upper cabinets, with quartz and flooring that related to the nearby kitchen.
Coordinating the rooms allowed storage, work surfaces, appliance locations and finishes to be reviewed together before ordering.
When a laundry room is visually or physically connected to a kitchen, cabinet lead times, flooring transitions, appliance connections and countertop fabrication should be considered in the same project schedule.
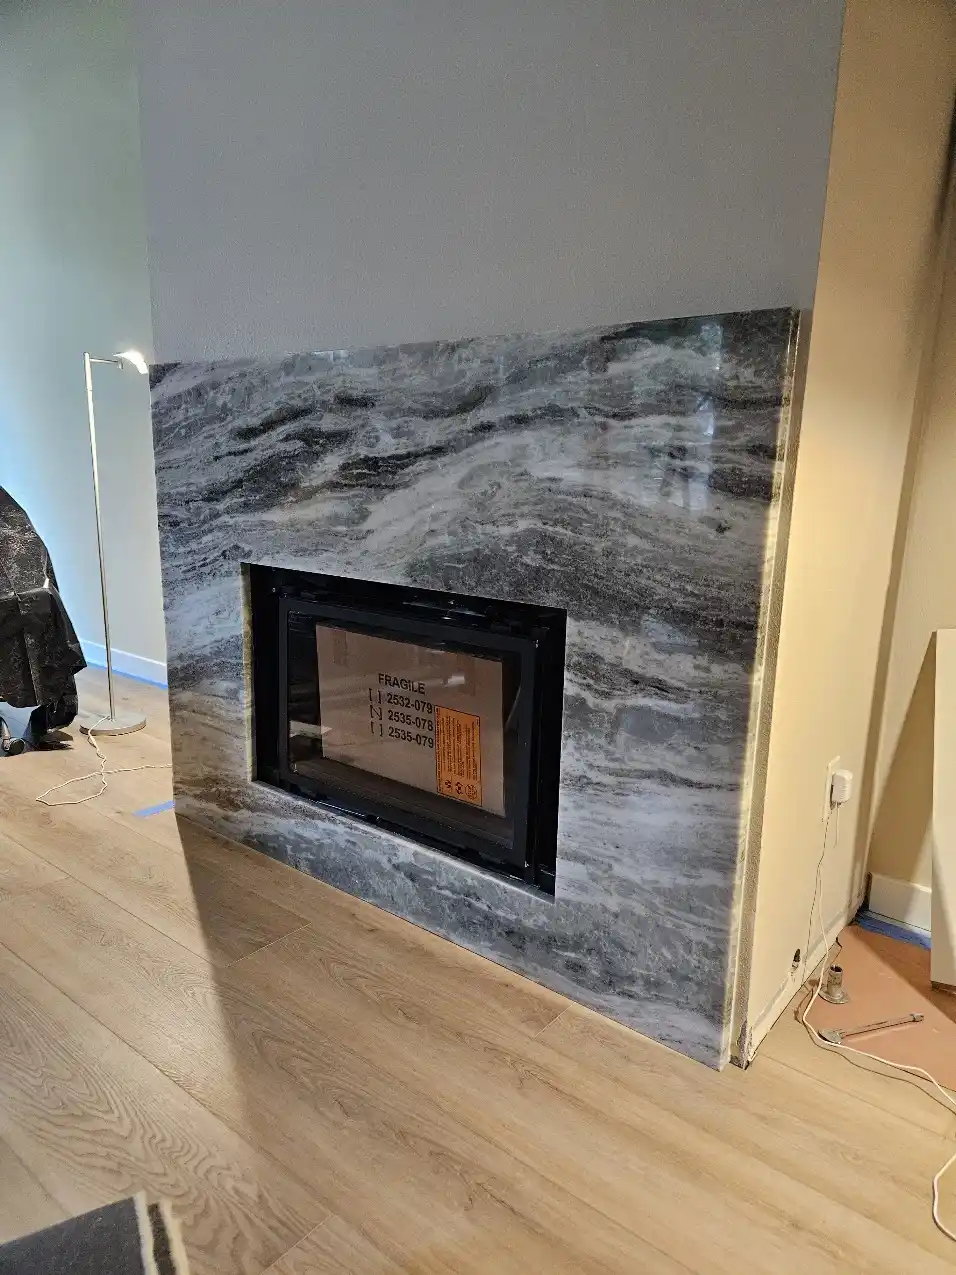
Fireplace Insert and Stone-Surround Coordination
The main-floor work also included coordination for a new fireplace insert and fabricated stone surround. Electrical work was required before the insert installation, and the stone fabrication raised an important visual decision about seam placement and vein alignment.
The fabricator recommended four seams. After reviewing the risks and appearance, the homeowner and project team approved four minimal seams, cut from the same stone area so the pattern could align as closely as possible.
The final seam arrangement reflected the selected stone, fireplace dimensions, fabrication limits and the homeowner’s preference for continuous-looking veining.
How the Bellevue Kitchen Remodel Moved From Design to Finish Work
The sequence below separates planning, material lead time and active construction. It reflects this completed project and should not be treated as a universal schedule for every Bellevue remodel.
Design development and homeowner approval
The kitchen layout, cabinet colors, appliance positions and connected laundry finishes were reviewed before the homeowner approved fabrication.
Material ordering and lead time
For this project, the kitchen materials were expected to require approximately three to four weeks after deposit and approval.
Demolition and wall investigation
The original flooring and kitchen components were removed, and the concealed shear-wall condition was identified after the wall was opened.
Engineering review and opening work
The wall work paused for additional review before the opening and support details were completed.
Rough electrical, plumbing and related preparation
Kitchen appliance circuits, sink connections, lighting and fireplace electrical needs were coordinated before finishes closed the work areas.
Flooring, cabinets and countertop templating
Main-floor LVP and the kitchen and laundry cabinets established the final dimensions for quartz fabrication.
Quartz, tile, appliances and final details
Countertops, backsplash, appliances, fixtures, lighting, panels, hardware and punch-list work completed the project.
What This Completed Bellevue Project Shows
The strongest lessons come from the actual decisions and field conditions documented during this remodel.
Verify wall conditions
Preliminary descriptions do not replace field verification. Concealed plywood or framing may require additional engineering review.
Approve appliances before cabinets
Model-specific dimensions affect tall units, fillers, circuits, ventilation and the final counter layout.
Plan connected rooms together
The kitchen, laundry, flooring and fireplace finishes were easier to coordinate as parts of one main-floor project.
Separate lead time from construction
Design approval and material ordering happen before active installation and should not be confused with on-site construction duration.
Was the removed wall non-load-bearing?
The wall had initially been described as non-load-bearing. After demolition exposed shear-wall plywood, the work paused for additional engineering and inspection review. The final opening used a project-specific support detail.
What cabinet style was installed?
The project used European-style flat-panel cabinetry with warm gray or cloth-gray lower units, contrasting light upper fronts, tall storage and specialty organization.
What countertop material was used?
New Calacatta Laza quartz was used across the kitchen and adjoining laundry room, with flat-polished edges and project-specific sink and fixture cutouts.
Was the laundry room included in this kitchen remodel in Bellevue?
Yes. The laundry room received coordinated cabinetry and related countertop and flooring finishes as part of the connected project scope.
Why was the electrical panel replaced?
The homeowner requested the panel replacement later in the project because the existing panel was outdated and lacked sufficient capacity for the updated appliance circuits. A licensed electrician completed the work. The amperage and meter were not changed.
How much flooring was installed?
The project documentation describes more than 1,100 square feet of New England Oak LVP installed across the main level to visually connect the remodeled spaces.
How were the fireplace stone seams handled?
The fabricator recommended four seams. The final approved approach used four minimal seams, with pieces cut from the same stone area so the veining could align as closely as possible.
Start With the Existing Layout and the Changes You Want to Make
Share the property location, current kitchen photos, approximate dimensions, appliance plans, rooms included in the scope and your planning budget. Bezruchuk Inc. will review the project and determine whether it is a good fit.